I'll upload any new progress and improvements in the next few days.
Friday, 7 June 2013
Play Through Video
I've made a brief play through video.
I'll upload any new progress and improvements in the next few days.
I'll upload any new progress and improvements in the next few days.
Thursday, 30 May 2013
The Unusual Suspects
Okay.
Here are my little creations. All in a neat line.


They each have an Idle animation for the diorama. Toro alone has been given more animations as he is the playable character in the level.
Here are my little creations. All in a neat line.


They each have an Idle animation for the diorama. Toro alone has been given more animations as he is the playable character in the level.
Tuesday, 28 May 2013
Teaser shots of the completed diorama
A few shots of the Minions diorama -

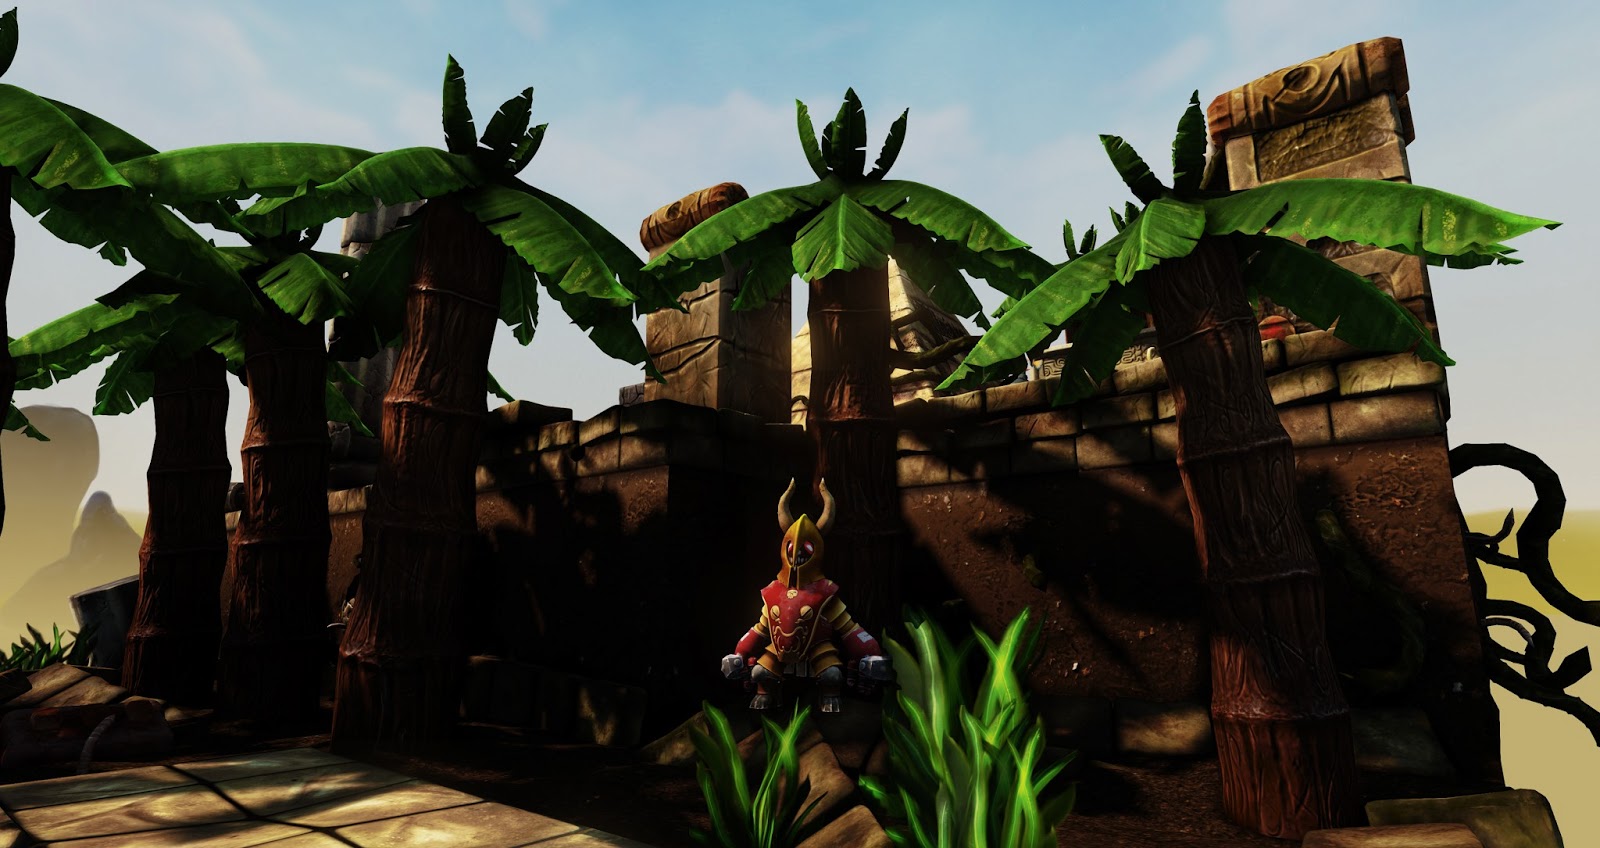
I need to add some movement to the palm trees. They look a bit unnatural being completely static.
I apologise for the awful video quality but it's the best I can do right now.
I was just testing out the movement of my chosen Minion - Toro.
I was tempted to make the environment appear cartoon shaded but I have decided it looks pretty good as it is so I can scratch that off the list right now.
Minion World Progress
I've been beavering away making assets to place in a diorama for my Minions and it's coming together quite well.


 |
| Wall Relief |
 |
| Pyramid |
 |
| Roman Column and Pedestal |
 |
| Old Slate Wall |
 |
| 4 Surface Pillar |
 |
| Palm Tree |
 |
| Temple Stone and Sand Floor with a Stone Ring Aperture |
 |
| Angled and Straight Vines |
 |
| Wild Grass |
 |
| Fire Brazier |
 |
| Soil Ground Plane |
 |
| Stone Blocks |
 |
| Background Planes |
 |
| Mega-Worm! |
 |
| Wooden Plank Platform |
 |
| Wooden Post |


Tuesday, 7 May 2013
Minion! Finally :D
At last - Minion!

Still texturing the little guy but he's coming along a lot faster than the previous Minions.
I guess he's lived in my head for so long it's not a hard stretch for me to visualise him in 3D space.

I'm strongly considering incorporating a comic-style shader in the diorama.
Need to do a little research on how to effectively pull that off. I really like the shadow quality of consistent colours in the 3ds max viewport.


 |
| This is the original concept for Minion which I have changed since starting this project to make him more heroic - he was a little dumpy ;) |
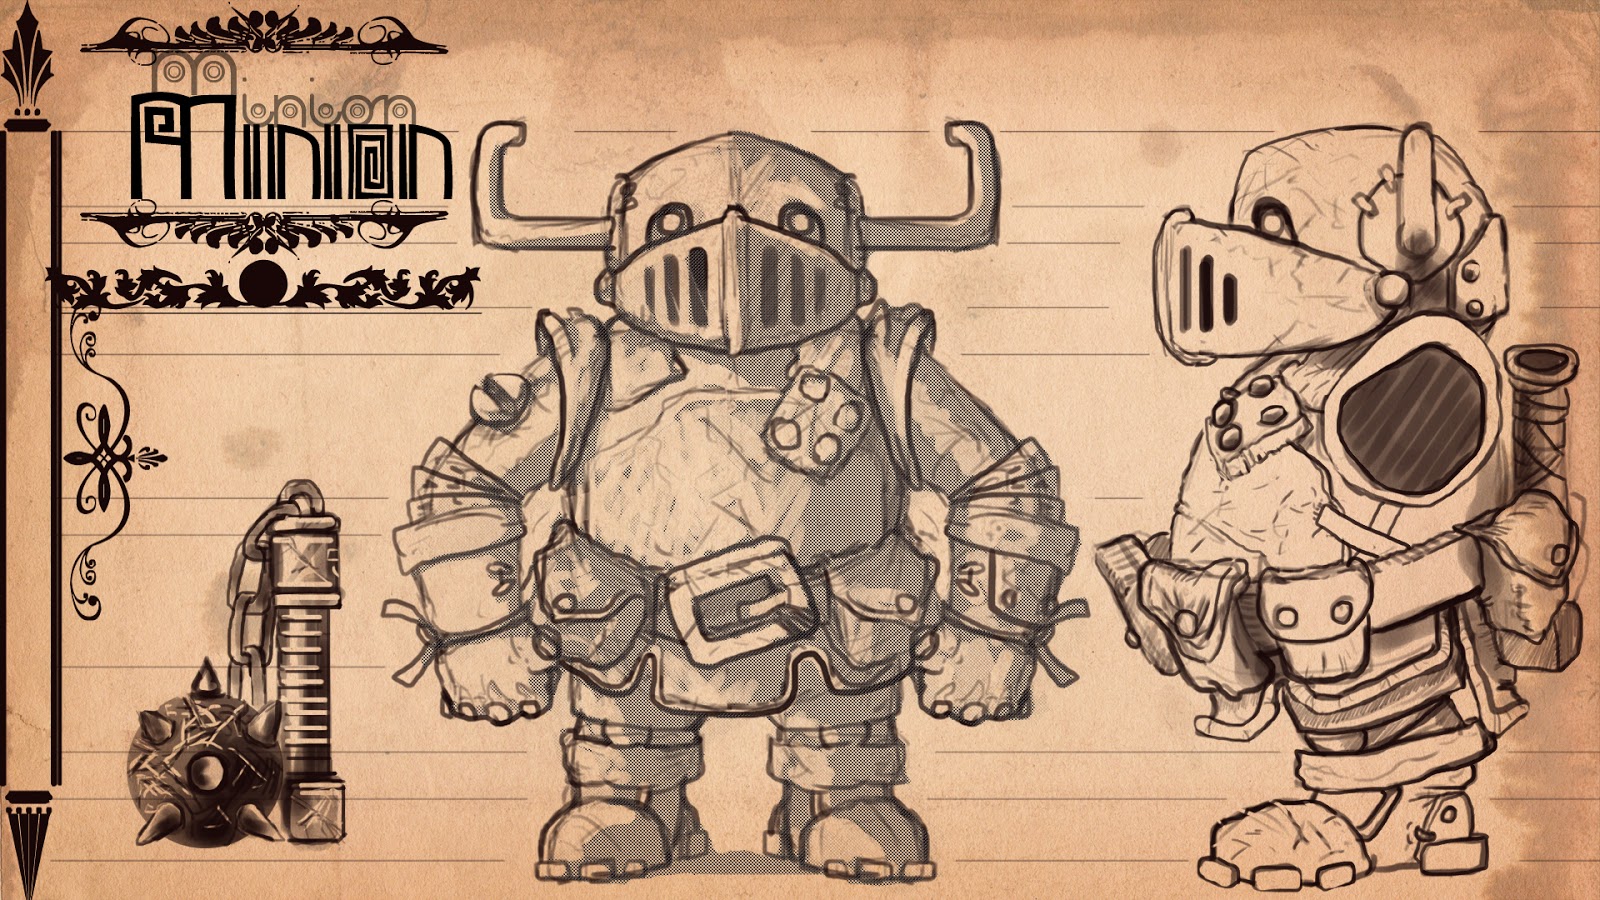 |
| He looks a lot more like a leading character now (that diet paid off) |

Still texturing the little guy but he's coming along a lot faster than the previous Minions.
I guess he's lived in my head for so long it's not a hard stretch for me to visualise him in 3D space.

I'm strongly considering incorporating a comic-style shader in the diorama.
Need to do a little research on how to effectively pull that off. I really like the shadow quality of consistent colours in the 3ds max viewport.


Wednesday, 1 May 2013
More to be Ertzed
Ertz is coming along nicely.
Using multiple maps has helped to maintain a consistent amount of texture density as I hoped it would.


I have a Biped set up for rigging with custom bones for the extra limbs.
I'm considering just having the Minions in idle poses for the end diorama as I don't think I'll have enough time to animate four individual run cycles for the hand in.
Thursday, 18 April 2013
Ertz - Gonna need a bigger boat!
So after creating the major parts of Ertz I soon realised I would be needing an extra allowance of Tris to accommodate his self and all of his accessories. I originally wanted to keep them around 8,000 - 9,000 Tris but due to his design Ertz will have to be an exception.


As you can see by the orthographic I plan to make some interchangeable appendages for Ertz. These can be placed on their own texture sheet like any other weapon or accessory would be.

Ertz has a very curious head shape not quite turtle but not so crocodile either.
For most of the Minion characters I know in my mind how they look in 3 dimensional space but eventually you come to a point where you say to your self "how is this supposed to look?"
Does his cheek tuck here? Does his body show there?
It was a fun process. Especially when you realise some designs will not work in 3D.
I assume this a problem that many concept art pieces bring to the table when redesigning them from the 2D to 3D.
Even after planning it out I wasn't sure how big to make his rucksack.

When viewing Ertz from over the shoulder all you will see is bag!
But this is his main characteristic so I'm not completely heart broken about it.
He is intended as more of a support character anyway, like a field medic.


It is important to not go into too much detail at this stage as there may be a chance you have to amend some UV's even if you have found an acceptable layout. A spark of inspiration may hit you and you might find you have to jig some of the UV islands around.

Originally I intended to keep the chest-plate in symmetry then I had the idea of placing a scratch across both sides. Luckily I had room on the UV layout to space the two pieces individually.

More updates to follow......


As you can see by the orthographic I plan to make some interchangeable appendages for Ertz. These can be placed on their own texture sheet like any other weapon or accessory would be.

Ertz has a very curious head shape not quite turtle but not so crocodile either.
For most of the Minion characters I know in my mind how they look in 3 dimensional space but eventually you come to a point where you say to your self "how is this supposed to look?"
Does his cheek tuck here? Does his body show there?
It was a fun process. Especially when you realise some designs will not work in 3D.
I assume this a problem that many concept art pieces bring to the table when redesigning them from the 2D to 3D.
 |
| I purposely made the legs long at this stage as they are finally going to be bent to give the impression of old age and even more so, bearing a heavy load. |

When viewing Ertz from over the shoulder all you will see is bag!
But this is his main characteristic so I'm not completely heart broken about it.
He is intended as more of a support character anyway, like a field medic.

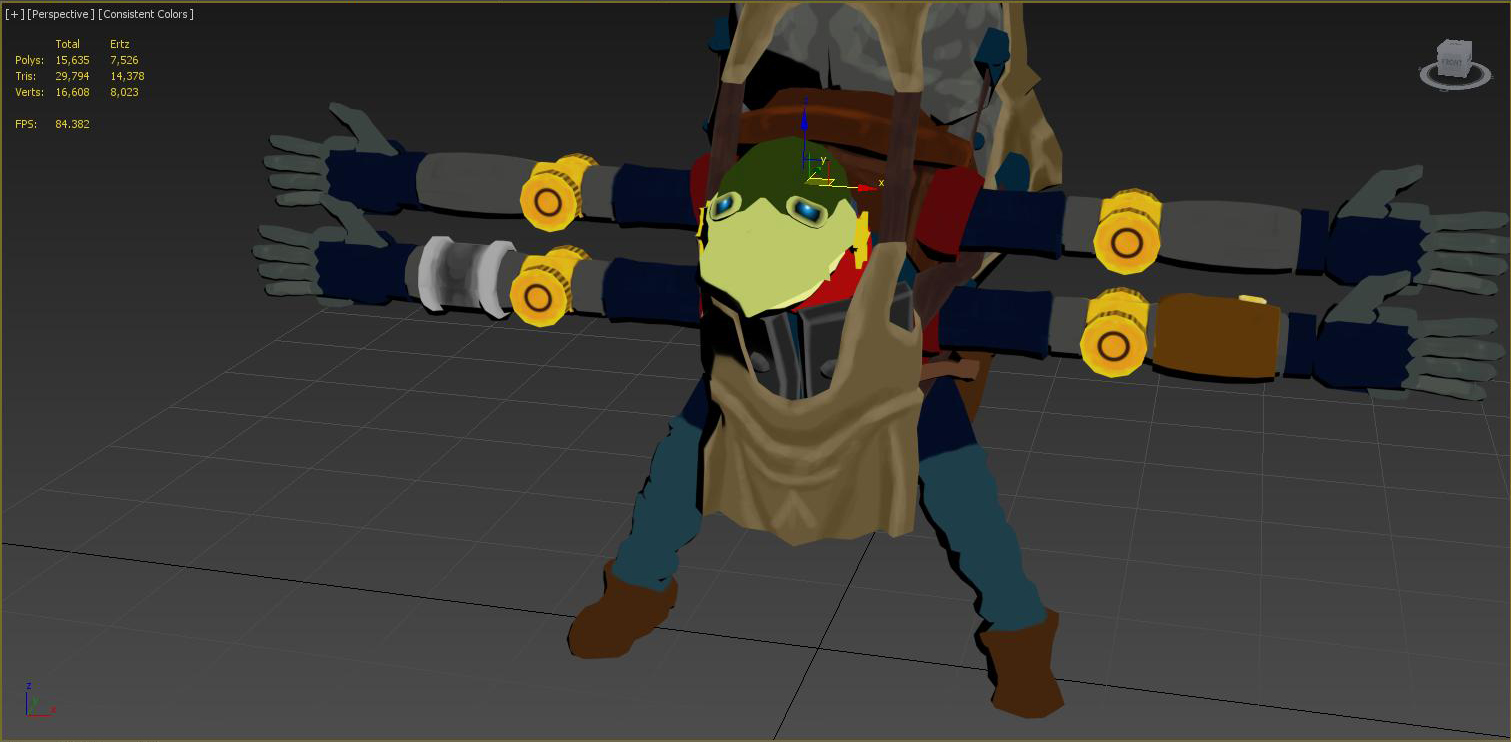 |
| At this stage he has four normal hands - The extra appendages will be made soon. |
 |
| A simple base colour texture to help me bring out each element of his design. |

It is important to not go into too much detail at this stage as there may be a chance you have to amend some UV's even if you have found an acceptable layout. A spark of inspiration may hit you and you might find you have to jig some of the UV islands around.

Originally I intended to keep the chest-plate in symmetry then I had the idea of placing a scratch across both sides. Luckily I had room on the UV layout to space the two pieces individually.

More updates to follow......
Subscribe to:
Posts (Atom)